By Mike Foran, Raw Milk Specialist, OMAFRA
 Milking procedures practiced by dairy goat producers are quite variable. During routine farm inspections we, as inspectors, try to specifically note what management practices producers with top notch milk quality carry out. Below is a summary of best practices for milking procedures based on recommendations by the National Mastitis Council. The National Mastitis Council is an international not for profit professional organization that promotes research and provides information to the dairy industry on udder health, milking management, milk quality, and milk safety. Some producers feel these recommendations are for cows and are not relevant to dairy goats. However our observations reveal that a good udder preparation and milking routine can improve milk quality (Bactoscan and Somatic Cell Count). How do your procedures compare?
Provide a clean, low stress environment for the goats
The benefit of always providing adequate bedding for the goats should not be underestimated. Before milking, hands should be thoroughly washed with soap and water and then properly dried.
Clip udders for cleanliness
Some goats tend to have a lot of hair on their teats. Although not a common practice, some producers clip the hair. Teats with long hair are difficult to clean and dry. Milking wet or dirty teats increases the risk of high bacteria counts in the milk and increases the rate of new cases of mastitis.
Check foremilk and udder for mastitis
Mastitis can be detected by examining by hand the udder and using a strip cup to examine foremilk prior to each milking. Milk should never be stripped directly into the hand because this spreads organisms from teat to teat and goat to goat.
Wash teats with an udder wash solutions, predip teats in an approved product, or use approved sanitizing dairy wipes
Using an udder wash in a bucket and individual paper towels to prepare the teats for milking is acceptable. Individual towels are highly preferred because sponges and common cloths transfer mastitis-causing organisms to uninfected teats and goats.
Predipping is also an acceptable practice. Predipping works best when teats are clean. The entire length of the teat should be immersed. Predip should remain in contact with the teat for 30 seconds and then be thoroughly wiped off prior to attaching the milking unit. Sanitizing dairy wipes are also an option. A teat drying step is not required with the sanitizing wipes.
Dry teats completely with an individual towel
If using an udder wash or predip, producers must dry the teats. Dry teats with individual paper towels or use separate cloth towels. Cloth towels can be laundered and dried after each milking. Milking wet teats increases the likelihood of mastitis and decreases milk quality.
Attach milking unit within 90 seconds after the start of stimulation
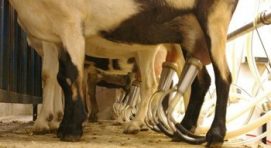
The milking machine should be attached as soon as possible after milk letdown occurs. Attachment should be done carefully to prevent excessive air from entering the milking system potentially injuring teat ends.
Adjust units as necessary for proper alignment
Observe units while they are attached to the udder to be sure they are adjusted correctly to help prevent liner slips. The greatest concern is slipping or squawking teat cups. The majority of new udder infections caused by liner slips occur near the end of milking when a teat cup liner slips and the liner opens, propelling small droplets of milk back against the end of the teat. These droplets may contain mastitis-causing organisms. Since milk flow near the end of milking is minimal, there is less flushing of the teat end and therefore increased risk of the organism remaining in the teat canal and causing infection if liner slips occur.
Shut off vacuum before removing unit
The unit should be removed as soon as the last half of the udder is milked out. In parlours equipped with automatic detachers, care should be taken to ensure they are properly adjusted. Vacuum should always be shut off before teat cups are removed. The practice of pulling the unit off under vacuum needs to be avoided because it may result in liner slips and new udder infections.
Dip teats with an effective product immediately after unit removal
Dip at least the lower one third of each teat. A good teat dip destroys organisms on teats, prevents them from colonizing in the teat canal, and may eliminate organisms already living inside teat ends. Research with dairy cows indicates teat dips reduce new infections by 50 percent.
Teat disinfection does not affect existing mammary gland infections but may reduce new infections of coagulase negative staphylococci (CNS). This is an important factor with dairy goats as CNS has been associated with high bactoscan results and is frequently cultured in high numbers
Maintain teat dip cups in a clean and sanitary manner
Teat spraying is an alternative to teat dipping and may be acceptable if done correctly with a device that provides good coverage.
Other management factors can help. If possible, milk first lactation goats first and problem goats (goats with clinical mastitis or high SCC) last to avoid transferring infections to new milking animals.
For more information on milking procedures, see Ontario Goat’s “Best Management Practices” manual.
